Sanity.io tips & tricks

Ideas on how to use Sanity.io to its best. Have one you'd like to share or something is unclear?
Reach out at @hdorodev 😉

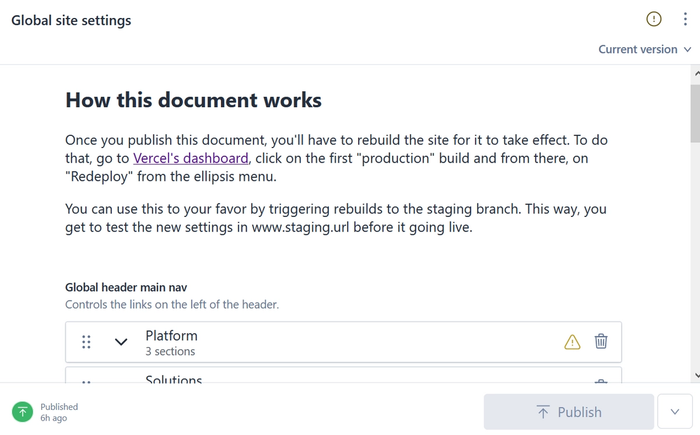
Using now() to generate dates

You can use now() in GROQ queries to get the current date and time (ISO string). Ideas:

💡 Idea: Use this to create a simple content calendar with a publishTime field in articles.

Example: get only posts with publishTime older than now()
{
  "timestamp": now(),
  "publicPosts": *[_type == 'post' && publishTime < now()]
}

Fine-grained ordering in GROQ via conditionals

If you want custom fine-grained ordering for your GROQ query, you can use `select` and conditionals to generate a priority/ranking number. Ideas:

💡 Surface most important support tickets
💡 Show in-season products before others
💡 Featured items before others

Ordering tickets by their type
// Get every ticket that needs review
*[_type == "ticket" && needsReview == true]{
  _createdAt,
  // And assign a priority given their type
  "priority": select(
    issueType == "accident" => 100,
    issueType == "nonconformity" => 50,
    10
  ),
  // You can also use conditionals to assign special priorities for a given issueType
  issueType == "improvement" => {
    "priority": select(
      expectedGain == "high" => 40,
      20
    )
  }
  // Finish by ordering the array:
} | order(priority desc, _createdAt desc) // 👈 notice the double order
Ordering products by their type
// Get every product type
*[_type match "product.**"]{
  _type == "product.physical" => {
    // Compound priority calculation
    "priority": 30 +
       	// High-percentage discounts come first
      	discount * 100 +
      	// Products in season need to go fast!
    	  select(season == $currentSeason => 25, 0),
  },
  _type == "product.digital" => {
    // Digital products come after physical products
    "priority": 10 + select(featured == true => 10, 0),
  },
  // Default priority
  !(_type in ["product.digital", "product.physical"]) => {
    "priority": 0,
  },
  // notice the variable inside the slice operation 👇
} | order(priority desc, price desc, _updatedAt desc) [0..$maxCount]

Document-wide validations

Document-wide validations can provide context-aware checking for better content. Ideas:

💡 prevent publishing if no keyword is found in headline
💡 make sure a featured product has at least 3 testimonials
💡 run a sentiment analysis & alert if disparate from style guide

Article headline checking
export default {
  title: "Article",
  name: "article",
  type: "document",
  validation: (Rule) => [
    Rule.custom((document) => {
      const keywords = document.keywords || [];
      // If no word in headline is in keywords, error out
      if (
        keywords.length > 0 &&
        !(document.headline || "")
          .split(" ")
          .find((word) => keywords.include(word))
      ) {
        return "Include at least one of the keywords in your headline";
      }
      return true;
    }),
  ],
  fields: [
    // ...
  ],
};
Featured product & testimonials
export default {
  title: "Product",
  name: "product",
  type: "document",
  validation: (Rule) => [
    Rule.custom((document) => {
      if (
        document.featured === true &&
        document.testimonials?.length < 3
      ) {
        return "Featured products need at least 3 testimonials";
      }
      return true;
    }),
  ],
  fields: [
    // ...
  ],
};
Sentiment analysis
export default {
  title: "Landing page",
  name: "page.landing",
  type: "document",
  validation: (Rule) => [
    Rule.custom(async (document) => {
      // Hit a sentiment analysis API and process its result
      const sentiment = await runSentimentAnalysis(document)
      if (sentiment.tone !== styleguide.tone) {
        return `This content is not adhering to our style guide.
        Got ${sentiment.tone} instead of ${styleguide.tone}`
      }
      return true;
    }),
  ],
  fields: [
    // ...
  ],
};

Ensure title & summary are different from each other
validation: Rule => Rule.custom(document => {
  if (!!document.title && document.title === document.description) {
    return "Title and Summary must be different from eachother."
  }
  return true
}),

Read-only fields can be used to display information to editors

You can use read-only fields with custom components to display information to editors

💡 Onboard editors with tooltips
💡 Let them know about a specific aspect of the document they're in
💡 Display data to inform their decisions

Code for the effect above
class EditorMessage extends React.Component {
  constructor(props) {
    super(props)
    this.state = {
      rating: undefined
    }
  }

  // A focus method is required, but we can leave it empty
  focus = () => {}

  componentDidMount() {
    getRatingsForLesson().then(
      rating => this.setState({rating})
    )
  }

  render() {
    return (
      <div>
        <h2>Updating lessons</h2>
        <p>
          {/* ... */}
        </p>
        <p>
          Rating for this lesson: {rating}
        </p>
      </div>
    )
  }
}

export default {
  // ...
  fields: [
    // ...
    {
      name: 'ignoreMe',
      title: 'Message for editors',
      type: 'string',
      readOnly: true,
      inputComponent: EditorMessage,
    },
  ]
}

Quickly update Sanity.io content with Sanity's CLI

Changing field values, formats and/or types across multiple documents? You can skip manual editing without writing code with @sanity/client.

Use sanity documents create updated-data.json --replace for quick data manipulation.

Namespacing schema types

For complex content structures, "namespacing" schema _types is proving to be super helpful for clarity and maintainability!

📃 Blog example: blog.post, blog.author, blog.category
🔊 Podcast example: podcast.episode, podcast.sponsor, etc.

Add descriptive names to text styles

Add descriptive names to text styles in the rich text editor to make it easier for editors to pick between them.

Besides better on-boarding, this will improve the accessibility and SEO of your content ✨

Credit goes to Ryan Murray @3200pro for the inspiration 🙌

Example block schema implementing this
// Example of re-usable mainContent schema
export default {
  title: "Main content",
  name: "mainContent",
  type: "array",
  of: [
    {
      type: "block",
      styles: [
        { title: "Paragraph", value: "normal" },
        // Notice the custom titles we're giving to headings:
        { title: "Section header", value: "h2" },
        { title: "Section sub-header", value: "h3" },
        { title: "Quote", value: "blockquote" },
      ],
    },
  ],
};

Quickly search in the Sanity.io site

If you access the Sanity.io website on a regular basis to check on documentation/tools/guides, your life will get a bit easier now:

🔍 Search the entire Sanity.io website from your browser's address bar in seconds (works on Chromium & Firefox browsers). Demo with Brave here.

For chromium browsers, you'll need to open the website at least once. Then, next time you type http://sanity.io in your address bar, press tab to turn that into a site search.

For Firefox, the process is a bit different, follow the video here.

Custom validation + warning

Guide and warn editors without removing their freedom with Rule.custom(...).warning().

💡 Letting them know page content should finish with a newsletter form
💡 Warn when a given content combination doesn't work
💡 Fetch competitors' prices from API and warn if too high or too low

Nudge editors to include a hero in a block content field
// Example #1 - block elements
validation: Rule => [
  // Warning if no hero block in body
  Rule.custom(value => {
    const heroInstances = (value || []).filter(
      (block) => block._type === 'hero',
    );
    if (!heroInstances.length) {
      return 'Having a hero in content is highly advised';
    }
    return true;
    // 👇 notice the warning here. It'll allow publishing
  }).warning(),

  // Error out if hero isn't first block
  Rule.custom(value => {
    const heroInstances = (value || []).filter(
      (block) => block._type === 'hero',
    );
    if (heroInstances.length && value[0] && value[0]._type !== 'hero') {
      return 'Hero must be the first block'
    }
    return true
  }) // 👈 no warning, so it'll error out
]
Warn if the price is too high with asynchronous validation
// Example #2 - async validation
const productPrice = {
  type: "number",
  name: "productPrice",
  validation: (Rule) => [
    Rule.required(),
    // Warning if price is too high or too low
    Rule.custom(async (priceValue, { document }) => {
      // Let Rule.required() above deal with missing values
      if (!priceValue) {
        return true;
      }

      const averageCompetitorPrice = await priceAnalysis(document.productType);

      // If price is +50% higher, warn editors
      if (priceValue / averageCompetitorPrice > 1.5) {
        return `This price is ${
          (priceValue / averageCompetitorPrice - 1) * 100
        }% higher than competitors`;
      }
      
      // If price is over +50% cheaper, warn editors
      if (averageCompetitorPrice / priceValue > 1.5) {
        return `This price is ${
          (averageCompetitorPrice / priceValue - 1) * 100
        }% lower than competitors`;
      }
      return true;
      // 👇 notice the warning here. It'll allow publishing
    }).warning(),
  ],
};

Alternative ways to write schemas

If you dislike Sanity's default way of writing schemas, you have alternatives! A couple of community packages to check out:

Simeon Griggs's quick fields: https://www.sanity.io/plugins/quick-fields

Rupert Dunk's sanity-schema-builder: https://www.npmjs.com/package/sanity-schema-builder

Espen Hovlandsdal's GraphQL schema: https://www.sanity.io/plugins/graphql-schema (thanks to Knut for the pointer on this)

Rupert's sanity-schema-builder
import { SchemaBuilder } from 'sanity-schema-builder';
import { OkHandIcon } from '@sanity/icons';
const S = new SchemaBuilder();

export default S.doc('person')
  .icon(OkHandIcon)
  .fields([
  	S.str('firstName'),
  	S.str('lastName'),
  	S.num('age')
  ])
  .generate();
// Quite similar to the structure builder, huh?
Simeon's quick fields
// Before...
fields: [
  {
    name: 'title',
    title: 'Title',
    type: 'string',
  },
  {
    name: 'published',
    title: 'Published',
    type: 'date',
  },
],

// After...
fields: [
    qF('title'),
    qF('published', 'date'),
],
Espen's GraphQL schema
import createSchema from 'part:@sanity/base/schema-creator'
import {fromGQL, graphql} from 'sanity-graphql-schema'

const schema = graphql`
  type Author implements Document {
    name: String!
    profileImage: Image
  }

  type BlogPost implements Document {
    title: String!
    slug: Slug
    body: Text
    leadImage: CaptionedImage
    tags: [String!]! @display(layout: "tags")
    author: Author!
  }

  type CaptionedImage implements Image {
    caption: String!
  }
`

export default createSchema({
  name: 'default',
  types: fromGQL(schema)
})

Let Sanity handle your image's format

Display images hosted in Sanity using auto=format for better performance. Sanity will automatically pick the best format for that image given the user's browser capability. ✨

Eventually all of your images will be upgraded to AVIFF with no effort on your end!

Example with @sanity/image-url
// Example taken from @sanity/image-url's README
import myConfiguredSanityClient from './sanityClient'
import imageUrlBuilder from '@sanity/image-url'

const builder = imageUrlBuilder(myConfiguredSanityClient)

function urlFor(source) {
  return builder.image(source).auto('format')
}
Example from an image's `_id`
const PROJECT_ID = "21bozpw5"

// Gets the URL of an image from its _id
function getImageUrlFromId(id, width) {
  // example asset._ref / image._id:
  // image-7558c4a4d73dac0398c18b7fa2c69825882e6210-366x96-png
  // When splitting by '-' we can extract the dimensions and extension
  const [, hash, dimensions, extension] = id.split('-')

  return `https://cdn.sanity.io/images/${PROJECT_ID}/production/${hash}-${dimensions}.${extension}?w=${width}&auto=format`
  // Notice the auto=format above 👆
}

Use environments in your sanity.json config

Use Sanity environments in sanity.json for differentiating between your development build and production.

💡 Enable the Vision plugin only in development
💡 Use a different dataset in production
💡 Different styles for each to prevent confusions

📚 Learn more in the docs for configuration environments.

Example implementation of these ideas
{
  "api": {
    "projectId": "project-id",
    "dataset": "staging"
  },
  "env": {
    "development": {
      // Enable the vision plugin in dev
      "plugins": ["@sanity/vision"],
      "parts": [
        // Implement specific styles
        {
          "implements": "part:@sanity/base/theme/variables/override-style",
          "path": "devStyles.css"
        }
      ]
    },
    "production": {
      "api": {
        // Use the production dataset in production
        "dataset": "production"
      },
    }
  }
}

Autocomplete in the vision plugin

When using the vision plugin to run queries, you can press CTRL/CMD + SPACE to open an autocomplete dialog to get a list of documents and objects implemented in your schema.

💡 Remember how you spelled a given document type
💡 Explore a schema you aren't familiar with

Developing 2+ Sanity studios at once

When developing two different Sanity projects, you can use sanity start --port 4444 to open another studio at the same time.

This is helping me a ton as I do plugin development, record tutorials & work on my own studio, hope it helps!

Specifying port on sanity start
sanity start --port 4444

Inclusive vs. non-inclusive slices

When getting a subset of documents in GROQ, beware of the dots!

[0..1] is different than [0...1]

They determine whether or not to include the last item in the list. *Inclusive* slices will return it, whereas *non-inclusive* slices won't.

Play around with it in my interactive GROQ guide.

Query with inclusive & non-inclusive slices
{
  // 4 tips, *including* tip[3]
  "inclusive": *[_type == "sanity-tips"][0..3],

  // 3 tips, *excludes* tip[3]
  "non-inclusive": *[_type == "sanity-tips"][0...3],
}

Extending the Portable Text block serializer

When customizing Sanity's default Portable Text rendering of blocks, you don't need to re-make the default serializer if using one of the official PT libraries (see code below)

💡 Easily add a centralized text paragraph style
💡 Add anchors to headings
💡 Style blockquotes

Minimal example in React
import React from 'react'
import BlockContent from '@sanity/block-content-to-react'

const BlockRenderer = (props) => {
  // Centralize text for a custom textCenter style
  if (props.node.style === "textCenter") {
    return (
      <p className="text_center">{props.children}</p>
    )
  }

  // Add anchors for headings
  if (['h1', 'h2', 'h3', 'h4', 'h5'].includes(props.node.style)) {
    const Element = props.node.style
    const id = `heading-${props.node._key}`
    return (
      <Element id={id}>
        <a href={`#${id}`} aria-hidden={true}>
          🔗
        </a>
        {props.children}
      </Element>
    )
  }

  // ✨ Fallback to the default serializer 👇
  return BlockContent.defaultSerializers.types.block(props)
}

const serializers = {
  types: {
    block: BlockRenderer,
  },
}

const RichText = ({ blocks }) => (
  <BlockContent
    blocks={blocks}
    serializers={serializers}
    renderContainerOnSingleChild={true}
  />
)

Build rich descriptions where needed

You can use JSX in field descriptions to add interactive & contextual documentation in @sanity_io

💡 Link to edit related documents
💡 (optional) videos w/ in-depth explanations
💡 Support chat widget

Credits to Rob Pyon for teaching me this!

Displaying iframes in descriptions
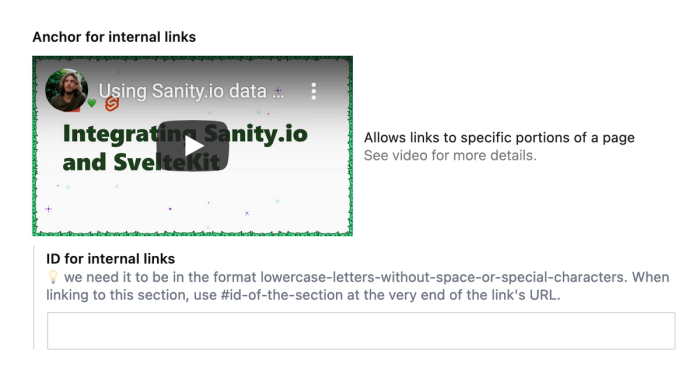
const explainedBlock = {
  name: "block.anchor",
  title: "Anchor for internal links",
  type: "object",
  description: (
    <div
      style={{
        display: "flex",
        paddingTop: "10px",
        gap: "10px",
        alignItems: "center",
      }}
    >
      <iframe
        style={{ flex: 1, aspectRatio: "16 / 9" }}
        src="https://www.youtube-nocookie.com/embed/xp1vT8ES8wQ"
        title="YouTube video player"
        frameborder="0"
        allow="accelerometer; autoplay; clipboard-write; encrypted-media; gyroscope; picture-in-picture"
      />
      <p style={{ flex: "1 0 200px", color: "#222" }}>
        Allows links to specific portions of a page
        <br />{" "}
        <span style={{ color: "#777", fontWeight: 300 }}>
          See video for more details.
        </span>
      </p>
    </div>
  ),
  fields: [/* ... */]
};

Displaying a link to edit another document
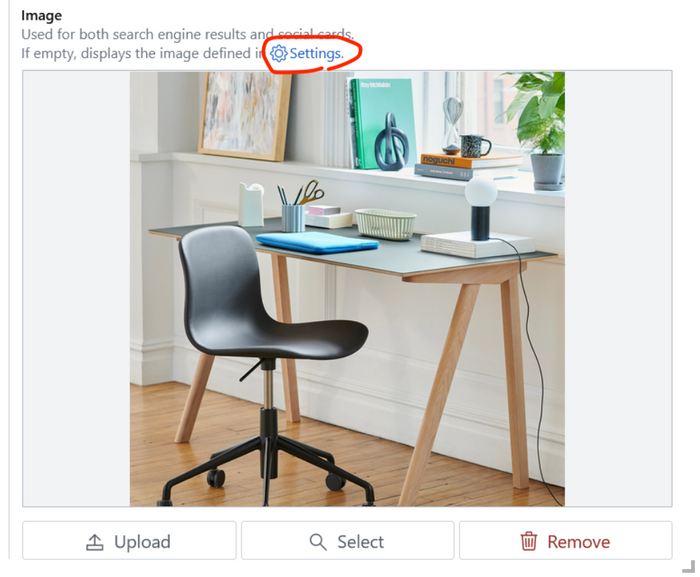
// Credits: Rob Pyon
const descriptionWithEditBtn = {
  name: 'image',
  title: 'Image',
  type: 'image',
  description: (
    <>
      Used for both search engine results and social cards.
      <br />
      If empty, displays the image defined in{' '}
      <IntentLink
        intent="edit"
        params={{ id: 'settings' }}
        style={{ marginLeft: '0.2em', whiteSpace: 'nowrap' }}
      >
        <CogIcon />
        <span style={{ marginLeft: '0.3em' }}>Settings</span>
      </IntentLink>
      .
    </>
  )
}